

General
How to photograph a solar eclipse safely and what you need for it
A solar eclipse is perhaps one of the most photographed events. It's so spectacular that it is completely natural you want to photograph it to cherish that moment afterwards.
Pointing a camera at the sun is not like any other photography challenge. Get it wrong, and you'll damage your camera. That's why it is important to prepare properly for a solar photography session, and we'll tell you how to do that in this guide.
Quick navigation:
- What to photograph during a solar eclipse
- Equipment for solar photography
- Which filter to use for a solar eclipse
- Camera settings for partial and total eclipse
- How to photograph a solar eclipse
- Extra tips
What phases to photograph during a solar eclipse?
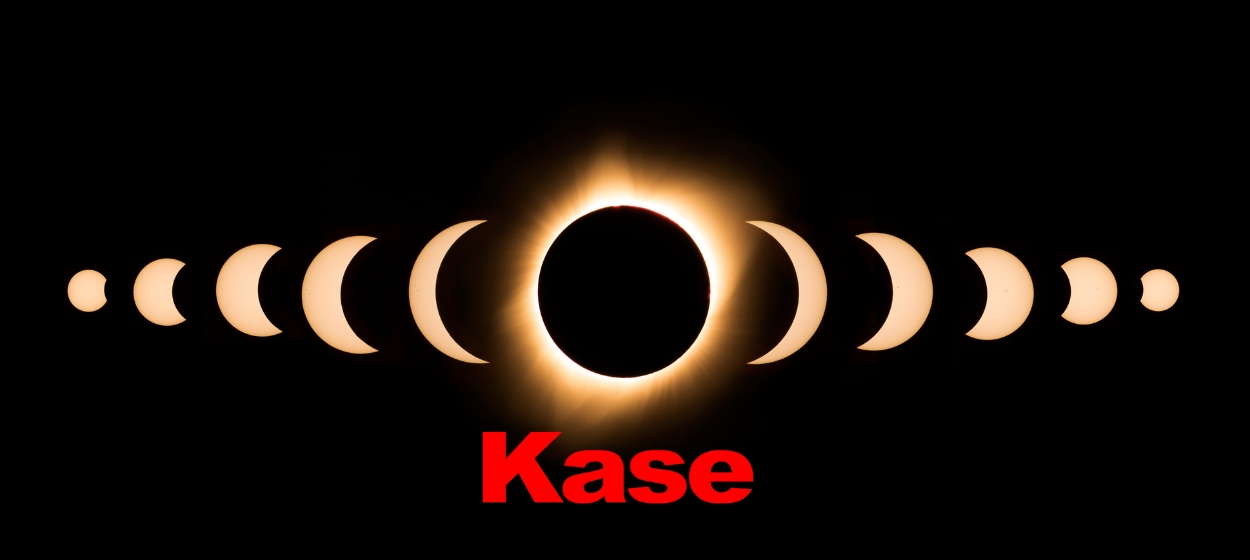
A total solar eclipse has a few phases, each offering something worth photographing:
The partial eclipse is the slow build-up. The moon gradually moves across the sun over about 70–80 minutes. The sun looks like it's being bitten into. It's not the flashiest phase, but it's a great opportunity to dial in your focus and exposure before things get intense.
Baily's Beads and the Diamond Ring happen in the final 20–30 seconds before totality. As the last sliver of sunlight squeezes through the moon's craters, you get tiny bright dots, so-called Baily's Beads, followed by one brilliant flash called the Diamond Ring. This stage lasts a few seconds. Your filter needs to come off quickly here.
Totality is the main event. The moon fully covers the sun, and you can see the corona glowing like a halo. This is the only time it's safe to photograph without a solar filter, and it typically lasts anywhere from a few seconds to a few minutes, depending on your location.
The return mirrors the opening sequence. Baily's Beads appear again, then the Diamond Ring, and then it's back to the partial eclipse.
Equipment you'll need for solar eclipse photography
You don't need a huge setup to photograph a solar eclipse well. Here's what actually matters:
- A telephoto lens. The sun is smaller than you think in the frame. A 100mm lens will show the sun quite small, but it is actually ideal for capturing the full, wispy outer corona during totality. Lenses in the 300–600mm range let you capture detail like solar prominences and Bailey's Beads, but you'll lose the outer corona. Pick your priorities.
- A solar or strong ND filter for your lens. You cannot point the camera at the partial eclipse without the filter, otherwise the sensor will get ruined.
- A solid tripod (preferably with a ball head) is non-negotiable. The sun will move in the frame a lot, and you will need to make precise adjustments throughout.
- A remote shutter release. Even the vibration of pressing the shutter button can blur your shots at long focal lengths. Use a cable release or wireless trigger. Alternatively, you can use a timer, but it is not as convenient as a remote shutter release.
- Solar eclipse glasses. For your own eyes during every phase except totality.
- Extra battery and memory cards. Live view and long sessions drain power fast. Bring a spare of everything.
Which filter do you need for solar eclipse photography?
To photograph a solar eclipse, you will need to use a special filter; otherwise, your camera's sensor will end up damaged. You have two options: either a solar filter or an ND filter with at least 16 stops. Regular ND filters with less than 16 stops are not safe for solar photography.
The filter should attach in front of the lens, not behind. Rear filters are not safe, since the concentrated solar energy can literally make the filter melt inside the camera body.
It is highly recommended to use an ND100000 filter that attaches magnetically to be able to remove it fast when a total eclipse happens.
Kase ND100000 filter with 17 stops is a perfect filter for shooting a solar eclipse: it protects the sensor and is convenient to use due to its magnetic attachment.
What about stacking several ND filters to get those 16 stops? It can work, but stacking many filters could potentially degrade the image quality, especially if they are not made of good optical glass. At Kase, we created a set of ND filters which you can safely stack and shoot solar eclipse.
Camera settings for partial and total eclipse
Eclipse photography requires two completely different exposure setups – one for the partial eclipse, and one for totality. The final settings will depend on your equipment and where you shoot from.
The key principle for photographing a solar eclipse is to lock your aperture and ISO and only adjust shutter speed. This keeps things simple during the process. Keep the aperture at around f/8 and ISO 100.
Camera settings for partial eclipse
Start with a shutter speed of around 1/640 to 1/1000 second and check your histogram. You want the sun bright in the centre without clipping the highlights on the right edge of the histogram. Adjust from there.
- Aperture: f/8
- ISO: 100
- Shutter speed: ~1/640–1/1000s (adjust based on your filter and conditions)
- White balance: Daylight
- Mode: Manual
- Shoot in RAW
Camera settings for total solar eclipse
During totality, the sun's bright disc is hidden, and you're capturing the corona, which is much dimmer. The corona also has an enormous range of brightness from its inner edge to its outer reaches, more than any camera can capture in a single shot.
That is why you will need to use exposure bracketing for capturing a total eclipse. Set your camera to bracket mode and capture a range of exposures. One recommended method:
- Aperture: f/8
- ISO: 100
- Shutter speeds: work through 1/1000s → 1/250s → 1/60s → 1/15s → 1/4s → 2s
Keep repeating the sequence throughout totality, paying attention to keeping the sun centred in the frame. The best shots often come at the midpoint of totality.
Modern cameras can be set to bracket automatically, letting you shoot multiple exposures with a single shutter press.
How to get a sharp focus when photographing a solar eclipse
Focusing on the sun is surprisingly tricky because autofocus often struggles with it.
Switch to autofocus first, and move the focus point to the edge of the sun. Let the camera lock on, then immediately switch to manual focus and leave it there. You don't want the camera hunting for focus again mid-eclipse.
Next, use your camera's live view and zoom into the image on the back screen. Look for a sunspot — a small dark spot on the sun's surface. Carefully turn the manual focus ring until the sunspot looks as sharp as possible. Once you've found that sweet spot, don't touch the focus ring again.
How to photograph a solar eclipse
- Before the eclipse starts: Attach the solar filter, confirm your exposure settings, lock focus, and start tracking the sun.
Attention: do not look through the viewfinder without solar glasses to not harm your eyes. Use only the live view. - First contact when the moon touches the sun's edge. Begin photographing every couple of minutes. (~70–80 minutes before totality)
- 2 minutes before totality: Stop shooting partial eclipse shots. Set the shutter speed to 1/2000s and prepare to remove the filter.
- 30–60 seconds before totality: Remove the solar filter.
- Diamond Ring and Baily's Beads: Shoot once per second as the diamond ring blazes and Baily's Beads appear.
- Totality begins: Switch to bracketing mode and start working through your exposure range. Keep shooting throughout totality.
- 20 seconds before totality ends: Turn off bracketing and continuous mode. Set shutter speed back to 1/2000s.
- Diamond Ring returns: Shoot once per second again as Baily's Beads and the Diamond Ring reappear.
- 30 seconds after totality ends: Reattach the solar filter. Return to partial eclipse settings.
Extra tips for solar eclipse photography
- Visit your location in advance. Visit the day before the eclipse at the same time of day. The sun will be in roughly the same position in the sky, so you can see exactly where it'll be relative to any landscape features you want to include. Try to shoot the sun with the camera settings to train before the eclipse.
- Don't use the optical viewfinder. Always use live view on the back screen when photographing the sun, even with a solar filter on.
- Turn off image stabilisation on a tripod. It can actually cause micro-vibrations when you're mounted and stationary.
- Shoot RAW. The ability to recover highlights and adjust white balance in post is invaluable for eclipse shots.
And the most important tip: make sure to look outside of the camera and enjoy this moment. Sometimes recording people's reactions can be even more valuable.
Photographing a solar eclipse: get ready beforehand!
A solar eclipse is the kind of event that rewards preparation. Know your gear, know the exact steps when on location, and have your settings dialled in before the day.
If you decide to capture the solar eclipse this year, make sure to get the right filter beforehand. It may be hard to find it at the last moment. Our Kase KW Revolution Magnetic ND100000 gives you the light reduction you need, the safety assurance the sun demands, and the quick-release magnetic system that makes the critical transition into and out of totality as smooth as possible.