


Frequently asked questions about GND filters
Here you will find all the answers to questions about how, when and where you can use graduated ND filters with your camera.
Top GND filters from Kase

In Stock

In Stock

Preorder possible

In Stock
Graduated Gray Filter
As the name of the filter already suggests, a gray gradient filter does not reduce the incoming light over the entire surface. On the one hand, this type of filter has a specified strength (e.g. ND8 to ND32), on the other hand it is made of clear glass and does not affect the exposure. Between these two sides there is a gradient from clear glass to gray filter, this gradient varies depending on the filter design.
The gray graduated filter is also known by the abbreviation GND filter, which is abbreviated to English for Graduated Neutral Density Filter. GND filters are used to compensate for the very different brightness levels of a subject.
These primarily occur when part of the subject is very dark, while another area is very bright. This is particularly common in landscape and architecture photographs.
The contrast range between foreground and background in agriculture is more than 16 f-stops and is therefore very large. A large and very bright part of the subject compared to the rest of the shot is the sky and clouds. To ensure that the sky does not appear burned out or the landscape in the picture appears too dark, a gray gradient filter is used and compensates for the differences in brightness. Without a GND filter, this effect can only be achieved with laborious post-processing.
What gradient filters does Kase offer you?
Graduated filters are divided into different strengths. Basically, the same information can be found in the designation of the strength of a gray graduated filter as with a gray filter. With GND filters, however, the range is significantly smaller. This usually goes from ND8 to ND 32. Anything above the ND32 filter no longer makes any real sense for a gray gradient, since the differences in brightness become too great. The number after the letters ND provides information about the strength of the filter
- GND 0.6 - 2 stops
- GND 0.75 – 2.5 stops
- GND 0.9 – 3 stops
- GND 1.2 - 4 stops
- GND 1.5 – 5 stops
These values indicate by how many stops the dark area of such a filter reduces the incoming light. In addition, there is an indication of how the filter progresses from clear to gray. A distinction is made between the following five variants:
- soft
- medium
- hard
- centre
- reverse
The soft, medium and hard GND filters are the most common variants. These have their darkest area at the top and get lighter towards the bottom. In the next section we will explain when and which type of photograph should be used.
How do the different GND filters differ and when should they be used?
Soft GND filter
These filters have a very smooth transition from clear to darkened. This makes them suitable for scenes that have a very broad or interrupted transition from the sky to the actual foreground. An example of such a scene is a mountain landscape that crosses the horizon line. The rock formations in the sea that you come across while on vacation are also predestined for taking photos with the help of a soft GND filter.
Read more about soft GND filters.
Medium GND filter
Our Medium GND filters are similar to the Soft GND filters, but the gradient is not quite as soft. These filters are the most versatile and can be used in most situations, such as shooting away from or against the sun.
Read more about medium GND filters.
Hard GND filter
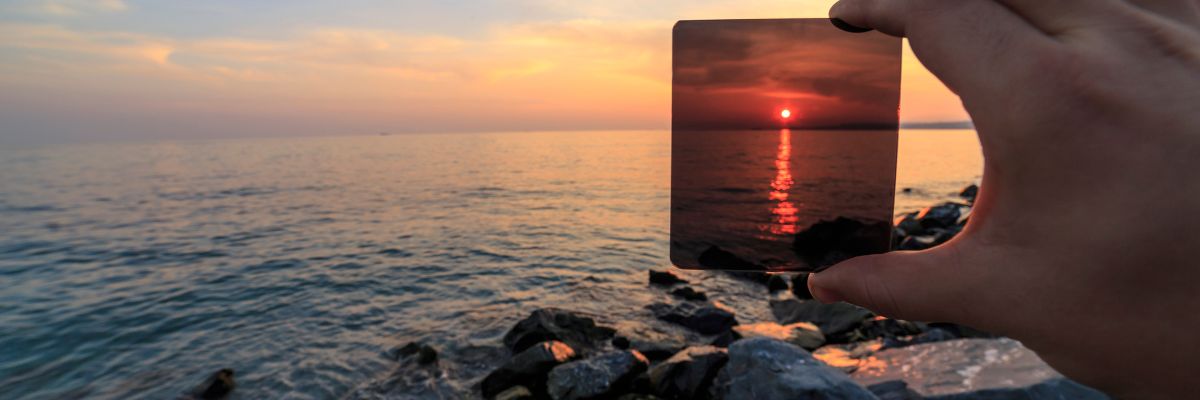
This type of GND filter has a hard gradient from clear to gray. Therefore, these are suitable for scenes that have a clearly visible transition from the sky to the actual foreground. This type of filter is most useful for landscape shots in which no element extends beyond the horizon, an example of this is the shots of the sea with a wide view of the ocean. In addition, these filters are used when a hard transition against the sun is needed.
Read more about hard GND filters.
Reverse GND filter
Reverse GND filters are similar to hard gradient GND filters except that the darkest part of the filter isn't quite at the top of the filter, but is shifted slightly down toward the middle. These filters are intended for shots that are taken against a light source and where the light is strongest on the horizon. The reverse filter is particularly useful when the sun rises and sets, because the upper and lower parts of the sky have different brightness levels.
Read more about reverse GND filters.
Center GND filter
Center GND filters have the darkest area in the center of the filter. There is a transition to clear glass at the top and bottom. These filters are used when photographs are to be taken against a light source. This is a great advantage, for example, when the sun is rising and setting.
What is the difference between gray filters and gray gradient filters?
If you compare a ND filter with a ND filter, you can see that the ND filter is completely darkened. The exposure time is extended by a neutral density filter, also known as an ND filter, by reducing the incident light. Similar to the GND filter, the ND filter also has different strengths and f-stops. In contrast to the gray gradient filter, the ND filters cannot be combined with one another. You can find more information about the neutral density filter in our FAQ.
How is a gray graduated filter used?
A distinction is made between screw filters and plug-in filters. The plug-in filter is used most frequently because screw filters have the disadvantage that they cannot be adjusted in height. This is because the actual filter is embedded in a ring that can then be used to screw it onto the lens. As a result, the dividing line between light and gray is usually fixed in the middle and the possibilities for image design are very limited. That is why it is necessary with screw filters in order to be able to optimally use the effect of a GND filter, to have a large range of GND filters. Unlike a screw filter, the height of a plug-in filter can be adjusted depending on the circumstances by pushing the gray graduated filter up or down.
In order to mount a gray filter, it is first necessary to screw an adapter ring onto the lens. A filter holder is then attached so that the filters are pushed into the filter holder in the next step. All you need is an adapter ring that matches the lens. Filter holders and graduated filters are not tied to specific dimensions. Thus, filter holders and filters can be used in many different ways. Depending on your preference, different strengths of gray gradient filters can be used or even combined with each other.
Do you have to pay attention to something when buying gray graduated filters if you own a Canon and a Nikon camera?
No, when buying filters, the brand of the camera is not decisive. Because GND filters can be used regardless of the camera brand of the photographer and can therefore be used with any manufacturer. Only the diameter of the lenses used is decisive when purchasing. However, you can also achieve great flexibility with adapter rings.
What makes angular gray gradient filters so practical?
Almost all of the filters presented in this article are also available in a round design for screwing or clipping on. However, a quick and frequent filter change with screw filters is not that easy. Because these are often screwed on too tightly and are difficult to loosen afterwards. Sometimes the focus of the camera changes or, in the case of zoom lenses, even the previously laboriously selected image section. Changing or removing rectangular filters is faster and easier because the filters are simply pushed into a filter holder. With a little practice, this even works without changing the image section or the focus, as long as the camera is on a tripod. Most photographers prefer to use gray graduated filters together with a filter holder so that the filters can be changed quickly and conveniently.
As previously described, the angular gray gradient filters are pushed into a filter holder. You quickly notice that these filters are often not square, but rectangular. This shape allows you to slide the graduated filter up or down within the holder. This gives you full control over where in the image the gray gradient begins and how much of the image is influenced by the gray gradient. In this way, the filter can be adapted to the desired image composition and, depending on the position of the horizon, adjusted accordingly. Unfortunately, this is not possible with graduated filters that can be screwed on.
How do you use a gray gradient filter correctly?
In general, as with so many things, you need a little experience and training when using gray graduated filters before you can repeatedly achieve good results. However, the digital cameras that are widely used today are of enormous help, since the result is immediately visible and you can correct it quickly and easily. The exposure time is not critical compared to gray filters, since the camera usually determines the correct exposure time itself thanks to the automatic aperture. However, there are two points that you should definitely take into account:
Choose the right strength
Before the actual recording, the question should be asked which filter strength is optimal. The motif is decisive for determining the strength. Based on the on-site conditions, you have to estimate how high the contrast range of the scene is and which gray graduated filter you have to choose on this basis. If a filter that is too weak is selected, the lighter or darker areas on the recording will disappear. On the other hand, if too strong a filter is chosen, the result may end up looking unnatural or lacking in contrast. For example, the GND filter with a strength of 0.6 only minimally darkens the image in the upper part. The GND 1.5, on the other hand, achieves the strongest darkening. A combination of the different gray graduated filters is possible. With the combination of a GND 0.3 and GND 0.6 you can achieve a density of 0.9 if this is not in stock.
The correct placement of the transition
This part requires some practice. The lower part of the darkening often protrudes a little beyond the actual subject to create a suitable transition. Here we recommend trying out as much as possible to get a feel for the positioning. So it can also make sense to simply photograph landscapes that are not the most beautiful with the GND filter in the evening after work, in order to get a feeling for working with the GND filter.
What filter size should you use?
Our square graduated filters are available in a wide variety of sizes. Whether square or rectangular, graduated ND filters are most commonly purchased in the following sizes:
- 75mm
- 100mm
- 150mm
Our Wolverine Series filters come in 75mm, 100mm, and 150mm sizes. The small 75 mm GND filters are also suitable for some compact cameras. However, the 100 mm filters are better suited for DSLRs with kit zoom lenses. If you also have lenses of better quality with larger filter threads, you should choose a graduated filter size of at least 100 mm. With ultra-wide-angle lenses or a lens with a very large mounting thread, even a 100 mm graduated filter is too small. If you own such lenses, you should go for the 150 mm or our 170 mm SkyEye.
What should you pay attention to before you want to buy a gray gradient filter?
- Color Fastness: Color fastness is an issue with GND filters. Color casts such as a bluish cast can render the images unusable. That's why Kase's gray gradient filters are characterized by excellent color neutrality.
- Coating: An oil- and water-repellent nano-coating is helpful when cleaning the filters.
- Quality: In order for you to be able to use your products for a long time, you should find out what the nature of the glass is like before you buy it. The optical glass from Kase is shockproof and convinces with its good quality.
What does aperture mean?
The easiest way is to compare the aperture of a lens with the human eye. The aperture controls how much light can fall on the camera's sensor. If the eye (or the aperture) is wide open, a lot of light penetrates, if it is closed, only little light comes through. In addition, the aperture also influences the depth of field, i.e. the extent to which the distance is shown sharply. The aperture is denoted by the prefix "f" (f-stop).
Example of the cat: In daylight, the eyes or the iris are very narrow and small, but when they go hunting at night, their iris is very wide open.
What is actually called landscape photography?
What does a landscape photographer really need, especially in terms of equipment and filters? So everyone should ask themselves: What do you want to implement in the recordings and with what means? What is landscape photography anyway?
A lot is technically possible these days, stacking, blending, multiple exposure, HDR, etc., and anyone who is talented in working with Photoshop only needs a few reference photos and uses them to virtually assemble their image. This is also called composing. But is that part of landscape photography?
Everyone must then know this for themselves, but we would perhaps only be talking about landscape photography in the broadest sense. But in reality, landscape photography is something completely different, namely capturing the light and mood of nature in the landscape, just as it really is or was at the moment. This is easier said than done, but it is precisely these challenges that make things really interesting for us. Graduated gray filters definitely help when capturing light and mood in the landscape.